
This is a project that I did with my family a few months ago. There was a lot of interest in building these, so I put these instructions together. There are many ways to build something like this. I encourage you to change this design, make it better, and figure out what works best for you.
These are mostly made of PVC pipe. I picked up 10 foot lengths of 1/2 inch PVC and 3/4 inch PVC for about $1.50 each. You can make several of these fishing rods with that much PVC pipe.
First, I used a hacksaw to cut pieces of both the 1/2 inch PVC and 3/4 inch PVC that were 10 inches long. Why 10 inches? No particular reason, you can make them whatever size you want.

I used some sandpaper to smooth the edges that I had sawed and to remove the markings from the outside of the PVC pipes.

You’ll need a 3/4 inch slip cap, a 1/2 inch slip cap, a 3/4 to 1/2 threaded connector (female/male), and a 1/2 to 1/2 inch threaded connector (female/female). These fittings cost around $0.60 each.
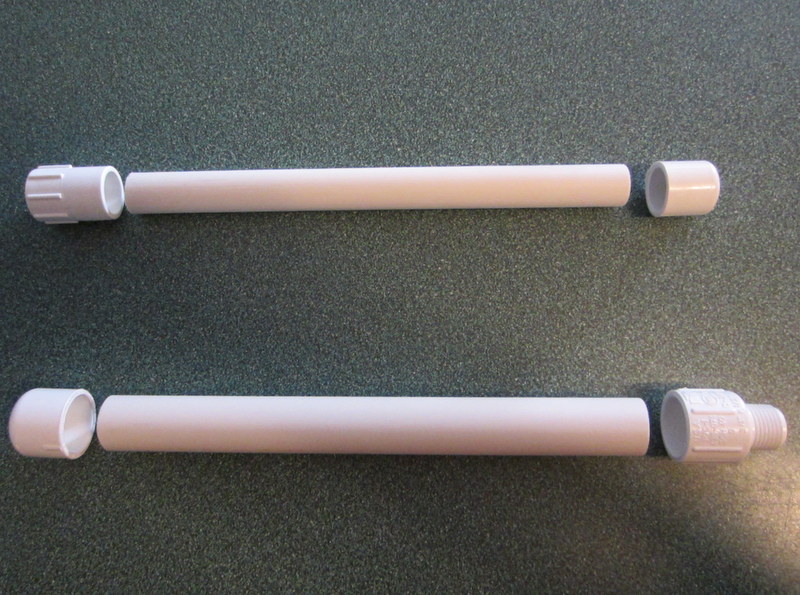
I didn’t need to use any adhesive to get the pieces to stick together. You’ll want to be able to remove the slip caps later on anyway, since you’ll be putting you’re fishing tackle into the handles.

I drilled 3 holes all the way through the 1/2 inch PVC pipe with a 3/32 inch drill bit.

I used pieces from medium sized binder clips to make the eyelets of the fishing rod.

Remove the silver parts and use pliers to bend them until they look like the one on the right.

Then, clip it into the holes that you drilled through the 1/2 inch PVC. You’ll need to do this three times.

We opted to use a premade ice fishing reel because it would have been difficult for our kids to build an improvised reel. However, I’ll show you a quick way to make one after I show you how we attached these. We paid $2.96 each for the reels.

We disassembled the reels and used the white plastic piece on the left as a guide for where to drill the holes into the 3/4 inch PVC pipe.

I used the same 3/32 inch drill bit from before to make the holes and then screwed the white plastic piece into the 3/4 inch PVC.

Then, you simply screw the two pieces together and you’ve got yourself a fishing rod! Don’t forget that the slip caps come off of each end, leaving you with plenty of room for storage in both sides.

This improvised reel is made from a spool of fishing line and a few pieces of hardware. I drilled a hole into the 3/4 inch PVC with a 7/64 inch drill bit. To secure it to the rod, I simply put a screw through the center of the spool and used a washer to make it more stable. Be sure not to tighten things too much or the reel won’t spin.
I put an eye screw into the 1/2 inch PVC to act as a guide for the fishing line and threaded a bolt into the plastic part of the spool to act as a handle for the reel.

The improvised reel works okay, but the action is not as smooth as the premade one. However, it is a little bit smaller and doesn’t cost as much.

It breaks down nicely for storage. I cut some pieces from an old bike tire inner tube to band the two halves together.
All of the external pieces are removable and can be stored inside the handle with exception of the reel itself.
So, there you have it! Go have some fun and let me know how it turns out.


Thats really cool
Thanks! My kids love them. My 5 year old has spiderman stickers all over his.
I like it. I’ve put together several emergency survival fishing kits which don’t take much space in a pocket or vest and you can usually find something to hang a line from. I have to admit that I like to have a rod handy and this design packs into a size that is handy.
Reblogged this on AdamG1975 and commented:
Great idea. Wonderfully detailed.
Dude! Fantastic instructable! I’m sure this is like a bank fisher, could you extend it another 2 sections and get something with longer casting range?